
Posterior Capsule Stretching Exercises
Step-by-step home exercise guide for Posterior Capsule Stretching to address internal rotation deficits (GIRD) using modified sleeper stretches.
Active rehabilitation is a cornerstone of recovery. Glenohumeral Internal Rotation Deficit (GIRD) occurs when the posterior capsule—the tissue that forms the back of the shoulder joint—becomes tight and restrictive, leading to a significant loss of internal rotation. This tightness is common in throwing athletes and individuals who perform repetitive overhead motions. In this guide, we detail targeted home stretching exercises, centering on the modified sleeper stretch, designed to safely restore internal rotation, release posterior capsule tension, and maintain healthy joint mechanics. Always perform these movements gently and within your pain-free range of motion.
General Guidelines & Safety Precautions
- Warm-Up First: Spend 5 to 10 minutes performing light movements, such as arm swings, shoulder rolls, or using a warm compress, to increase blood flow to the shoulder capsule before stretching.
- The Pain Rule: Stretches should feel like a deep, comfortable pull. Do not push into sharp, pinching pain, especially in the front or top of the shoulder (which indicates impingement). If you feel pinching, adjust your angle or stop.
- Breathe Continuously: Do not hold your breath during stretches. Take slow, deep breaths to help the muscles and capsule relax.
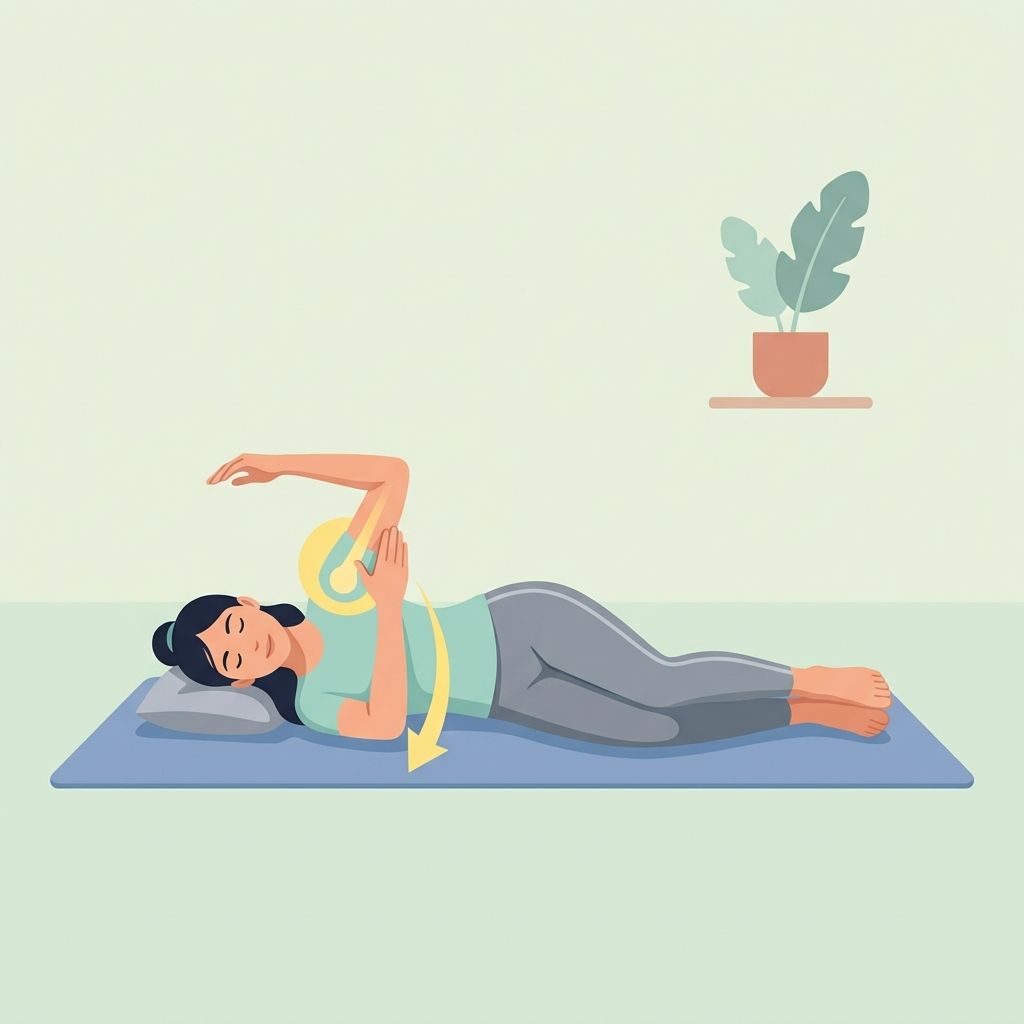
Exercise 1: Modified Sleeper Stretch
Purpose: Directly stretches the tight posterior capsule. By rolling slightly backward, you place the shoulder in the scapular plane, which minimizes the risk of subacromial impingement compared to the traditional version.
Equipment Needed: A firm mat or bed, and a pillow.
Starting Position: Lie on your side (on the affected shoulder). Place a pillow under your head. Roll your upper body backward about 20 to 30 degrees so you are resting on the back of your shoulder blade rather than directly on the tip of your shoulder. Extend the affected arm straight out in front of you, then bend the elbow to 90 degrees so your hand points toward the ceiling.
Step-by-Step Instructions:
- Grasp the wrist of the affected arm with your unaffected hand.
- Slowly and gently guide your forearm downward toward the bed (rotating your arm inward).
- Stop immediately when you feel a mild-to-moderate stretch in the back of your shoulder.
- Hold the stretch steady for 30 seconds. Do not force or bounce the arm.
- Slowly release the stretch and return to the starting position.
Dosage: Perform 3 repetitions, 2 times daily. Hold each stretch for 30 seconds.
Tips & Common Mistakes: Never lie directly on the point of your shoulder, as this pinches the joint. Keep your arm and shoulder relaxed; let your unaffected hand do all the guiding.
Exercise 2: Cross-Body Stretch with Scapular Stabilization
Purpose: Stretches the posterior capsule and posterior rotator cuff muscles while stabilizing the shoulder blade against a flat surface to maximize stretch efficiency.
Equipment Needed: A wall or solid doorframe.
Starting Position: Stand tall with your back flat against a wall. Raise your affected arm to shoulder height and bend it slightly across your chest.
Step-by-Step Instructions:
- Use your unaffected hand to grasp the elbow of the affected arm.
- Gently pull the affected arm across your chest.
- While pulling, keep the back of your affected shoulder blade in contact with the wall to prevent it from sliding forward.
- Hold the stretch for 30 seconds when you feel a comfortable pull in the back of your shoulder.
- Slowly return to the start.
Dosage: Perform 3 repetitions, 2 times daily. Hold each stretch for 30 seconds.
Tips & Common Mistakes: Do not let your shoulder blade shrug up toward your ear. Keep your shoulders level and relaxed.
Exercise 3: Behind-the-Back Towel Stretch
Purpose: Improves functional internal rotation, mimicking the motion needed to reach behind your back.
Equipment Needed: A hand towel or strap.
Starting Position: Stand tall. Hold one end of the towel in your unaffected hand, draping it over your unaffected shoulder and down your back. Reach behind your lower back with your affected arm and grasp the other end of the towel.
Step-by-Step Instructions:
- Using your unaffected hand in front of your chest, slowly pull the towel upward.
- This will gently pull your affected hand higher up your back.
- Stop when you feel a comfortable stretch in the back or side of your affected shoulder.
- Hold the stretch for 20 to 30 seconds.
- Gently lower the arm back down.
Dosage: Perform 3 repetitions, 2 times daily. Hold each stretch for 20 to 30 seconds.
Tips & Common Mistakes: Avoid bending forward at the waist or arching your back. Maintain upright posture throughout the stretch.
Exercise 4: Prone Scapular Retraction & Internal Rotation
Purpose: Actively stabilizes the scapular muscles while placing the shoulder joint into internal rotation to improve mobility and strength.
Equipment Needed: A bed or table.
Starting Position: Lie face down (prone) near the edge of a bed or table. Let the affected arm hang straight down toward the floor.
Step-by-Step Instructions:
- Squeeze your shoulder blade inward toward your spine.
- Lift your arm out to the side at shoulder height, keeping the elbow bent at 90 degrees (hand pointing toward the floor).
- Gently rotate your hand and forearm backward and upward toward the ceiling, keeping your elbow in line with your shoulder.
- Hold this active position for 5 seconds.
- Slowly lower the arm back to the hanging position.
Dosage: Perform 2 sets of 10 repetitions, once daily.
Tips & Common Mistakes: Do not shrug your shoulder up toward your neck. Ensure the rotation occurs at the shoulder joint, not by twisting your torso.
Always consult with your physical therapist or doctor before starting a new exercise routine. If any exercise causes persistent pain or swelling, discontinue it and contact your healthcare provider.
Disclaimer: This guide provides general exercise instructions and is not a substitute for professional medical advice. Always consult your doctor or qualified healthcare provider with any questions you may have regarding your specific medical condition and treatment plan.

Related articles
Browse all articlesTrusted External Resources
Curated educational materials to help you make informed decisions about your orthopaedic bone & joint conditions.

Orthopaedia

Orthogate Patient Education